


Invite and Manage Users
There are several ways available to add and create User Accounts in Ideanote:
People Section
The simplest way to add colleagues especially at the very beginning

- Go to the Settings
- Go to People
- Click on the “Add”button located on the upper right level
- Enter the User details
- Enter a Message (Optional)
- Click on Send Invites
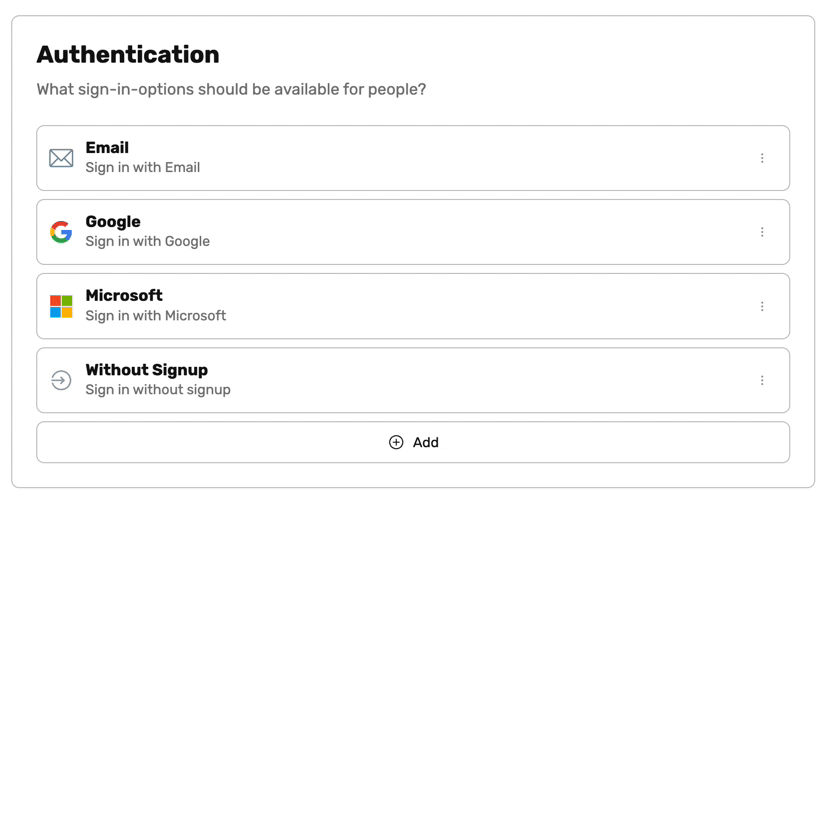
Single-Sign On
SAML-based single sign-on (SSO) - Just-in-Time- gives members access to Ideanote through an identity provider (IdP) of your choice.
Further instructions and relevant information here.
Invite
Send out personal email invitations by adding an email when sharing an idea collection.
Further instructions and relevant information here.
Bulk Upload
Workspace Owners and Admin Users are able to upload Users in Bulk using a .cvs file.
Further instructions and relevant information here.

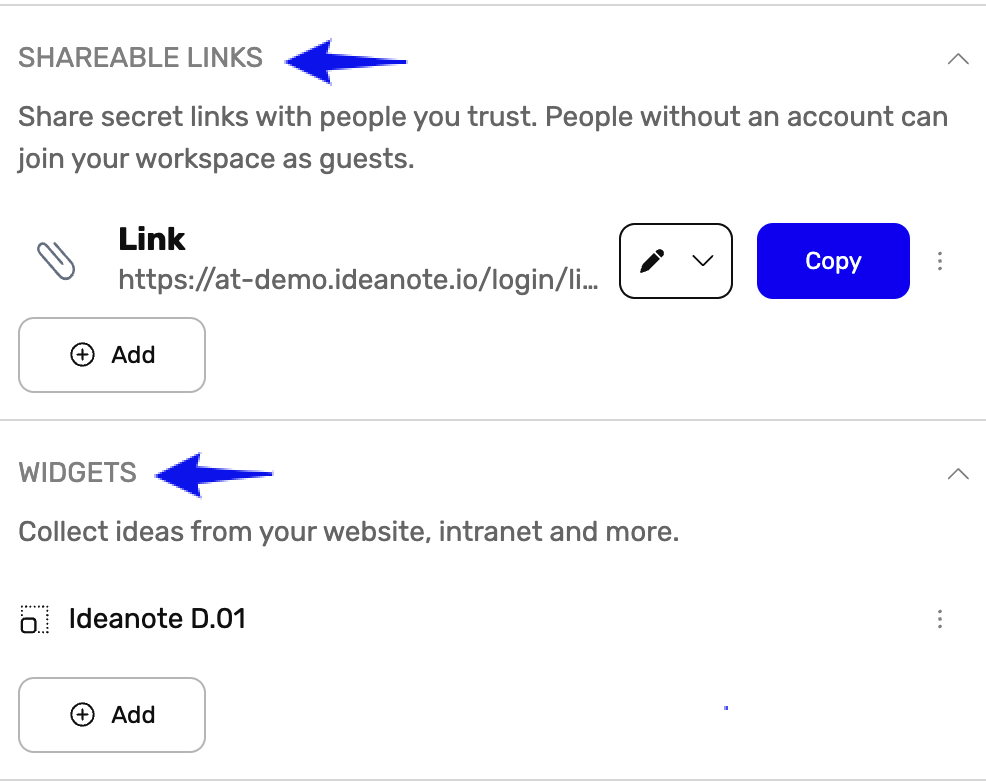
Shareable Links
Workspace Shareable Link and Idea Collections' Shareable Links can also be used to Invite an audience.
Please access instructions and relevant information here.
User Rank
In Ideanote there are 6 Ranks a User can have. You can understand that as a type of Role that gives specific access to functionality
- Workspace Owner
- Admin
- Section Owner
- Member
- Guest
- External User
Rank Definition
Workspace Owner
This user created the workspace, can assign Admin ranks, has complete access to all Workspace Settings and Billing information.
Admin
This user is assigned by the Workspace Owner to help administer the Workspace.
This user can create Idea Collections, invite and manage an audience, set up global templates, evaluation criteria, etc.
This user cannot access Billing information, Security, and Audit Logs.
Section Owner
This user is assigned a Section by Admin Users.
The User can manage any idea collections visible to them in the assigned Section.
Members can be given Section Owner rights. Guests can not have Section Owner rights.
Section Owners visibility to Idea Collection is permission based.
Guests and Members
These users can do many of the same things because their rights on your Workspace depend mostly on the access given to them within the Idea Collections they are invited to.
Here are some examples of differences between the two Ranks:
- If you launch an Idea Collection that is open to everyone on your Workspace, this will include Members, but not Guests.
- Guests will never have access to an Idea Collection unless they have been specifically invited to it, whereas Members might as is the case in the above example
- Members can use SSO but Guests cannot.
External User
This final Rank is highly restricted in their access and can only ever see one particular Idea Collection, and does not have access to tabs such as Insights.
This Rank is typically used when engaging customers or external parties on a Workspace that holds sensitive information or for Open Innovation Campaigns.
Access can be granted using Shareable Link or Widgets.
Disable or Delete Users
Workspace Owners or Admin users are able to delete Users easily with few clicks.
Disabled Users can be reactivated at a later time. Deleted Users must be invited again to gain access.

To disable or delete Users
- Go to Settings
- Go to People
- Search for the User
- Click the three dots ("⋮") to the right of the name
- Click Disable or Delete
Workspace Owners or Admins can also delete or disable many people at once using the Bulk Actions in People.

.svg)
