


Advanced Widget Options
Advanced Widget options include powerful low-code features that let you to effortlessly design an extraordinary innovation journey for your audience.
Whether you are creating a brand-new Widget or fine-tuning an existing one, the preview window gives you a glimpse into the magic of real-time visualization.
Tip: Rename your Widgets to user-friendly names - instead of keeping the randomly generated ones. Choose names that may indicate to other editors where Widgets are embedded e.g. Intranet Campaign June 2023.
Edit Widget Appearance
Edit Basic Widget Appearance
For each Widget you can decide the Widget Type, the Primary Color and the language.
The Language settings allows you to customize how a Widget appears for users on first load. You can use the default Workspace language, the browser language of the user or choose a specific language like French.

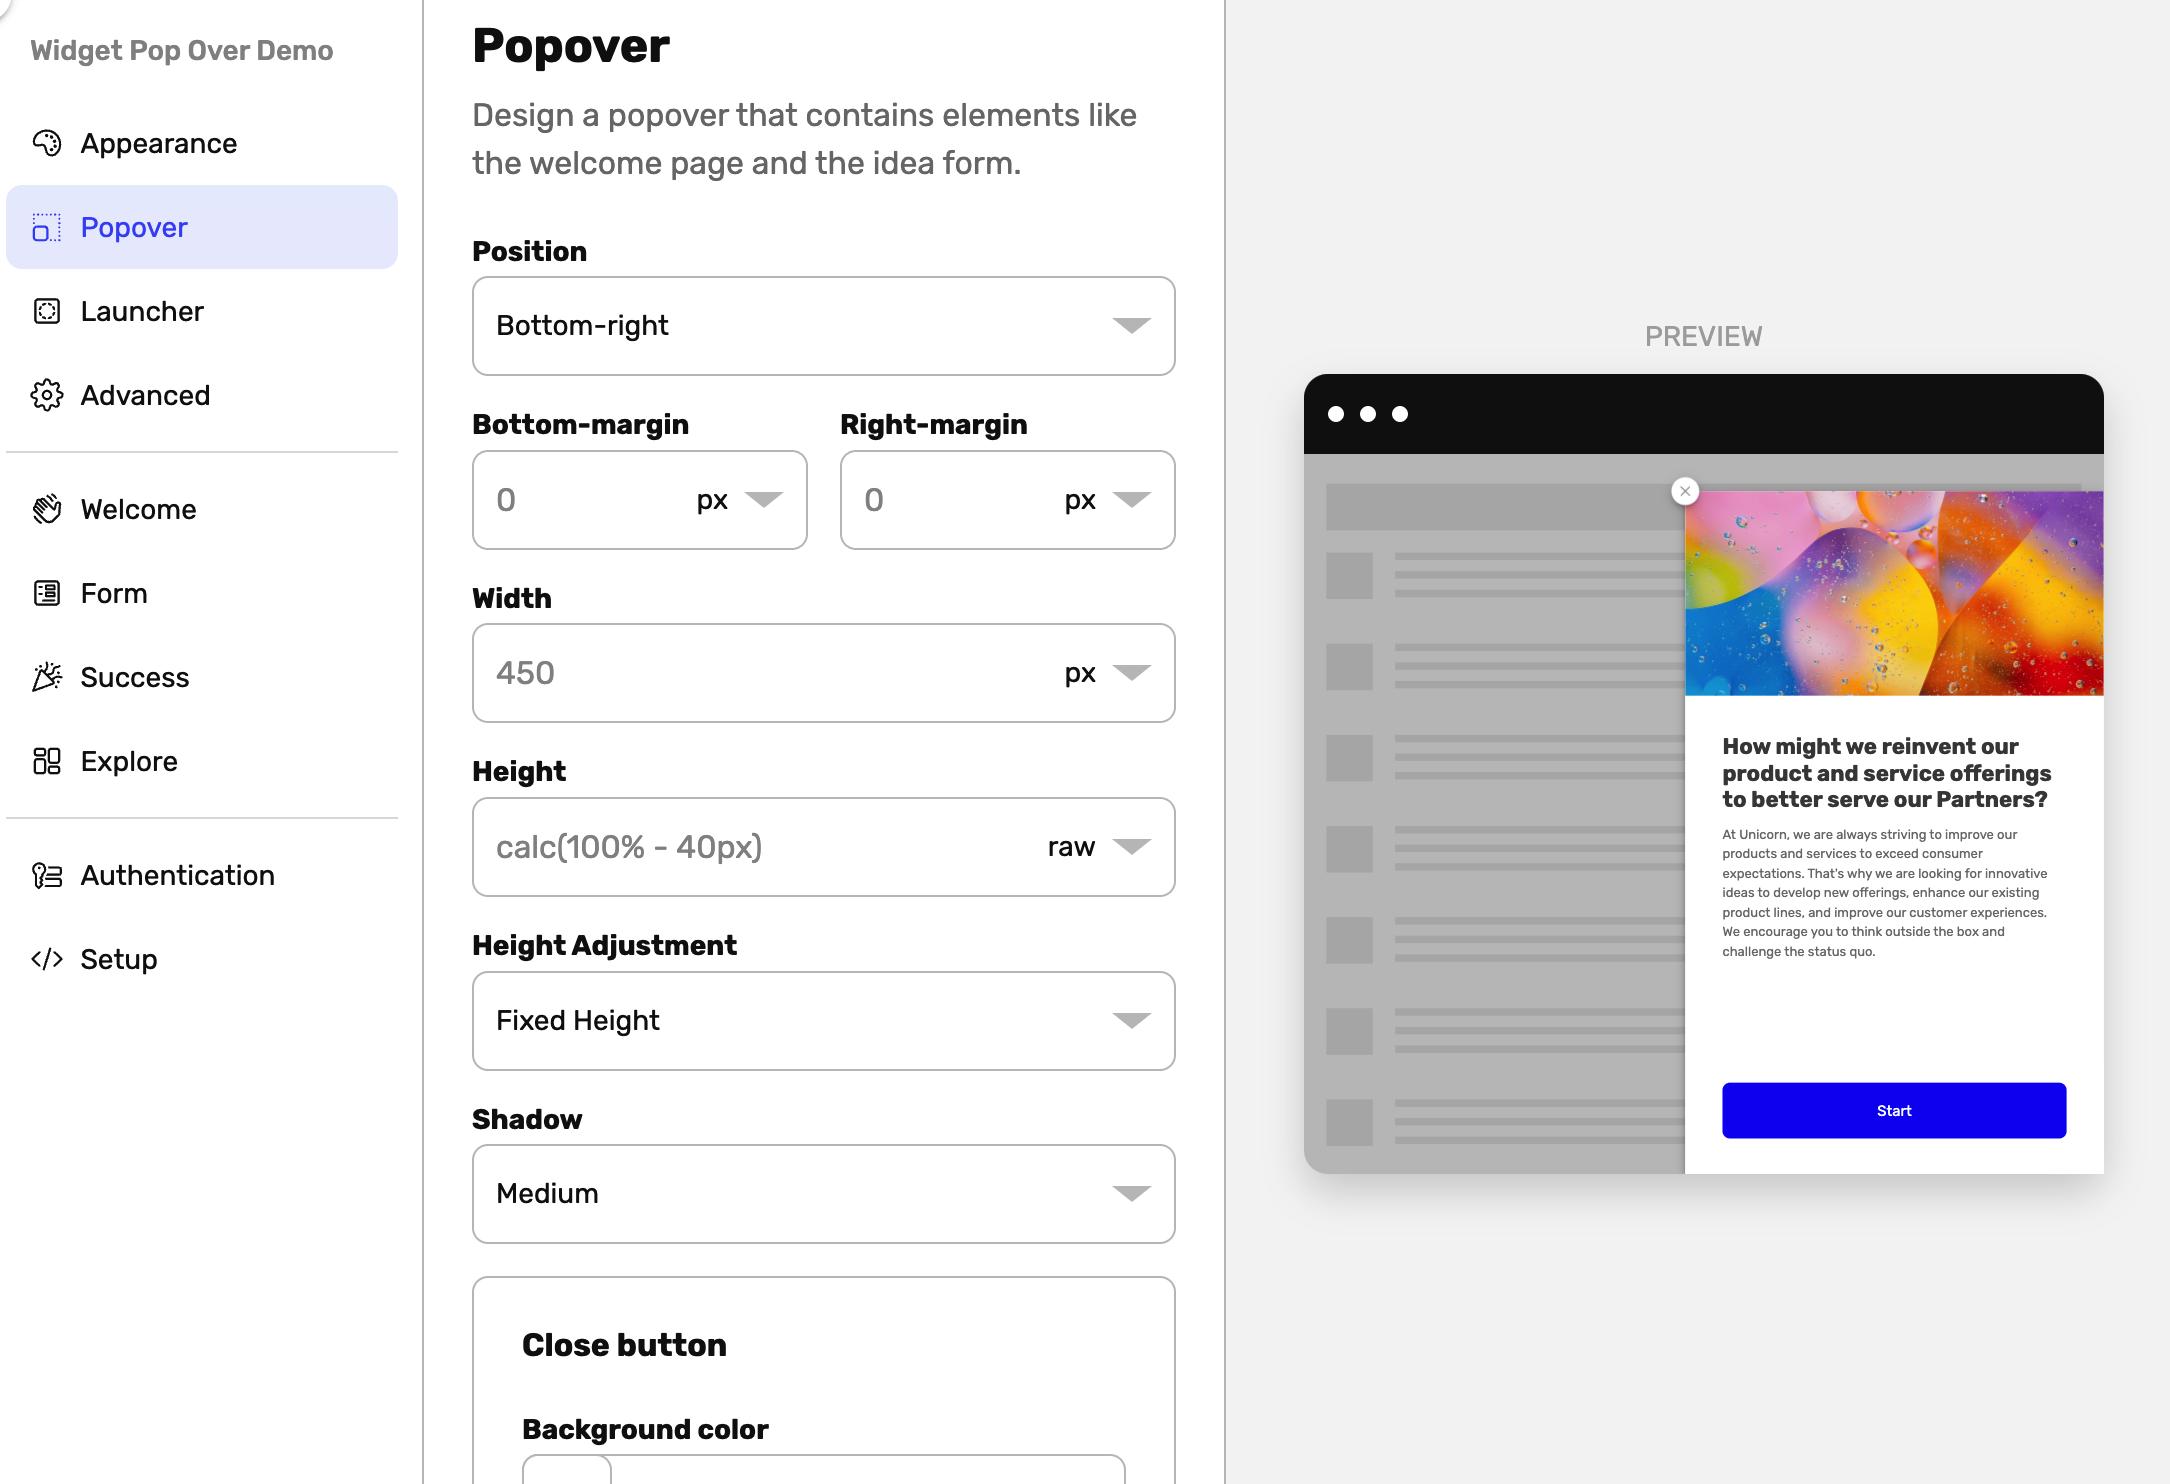
Edit Pop Over Widget Appearance
You can define where and when the Pop Over Widget should appear. These settings only appear if you have selected the Pop Over type.
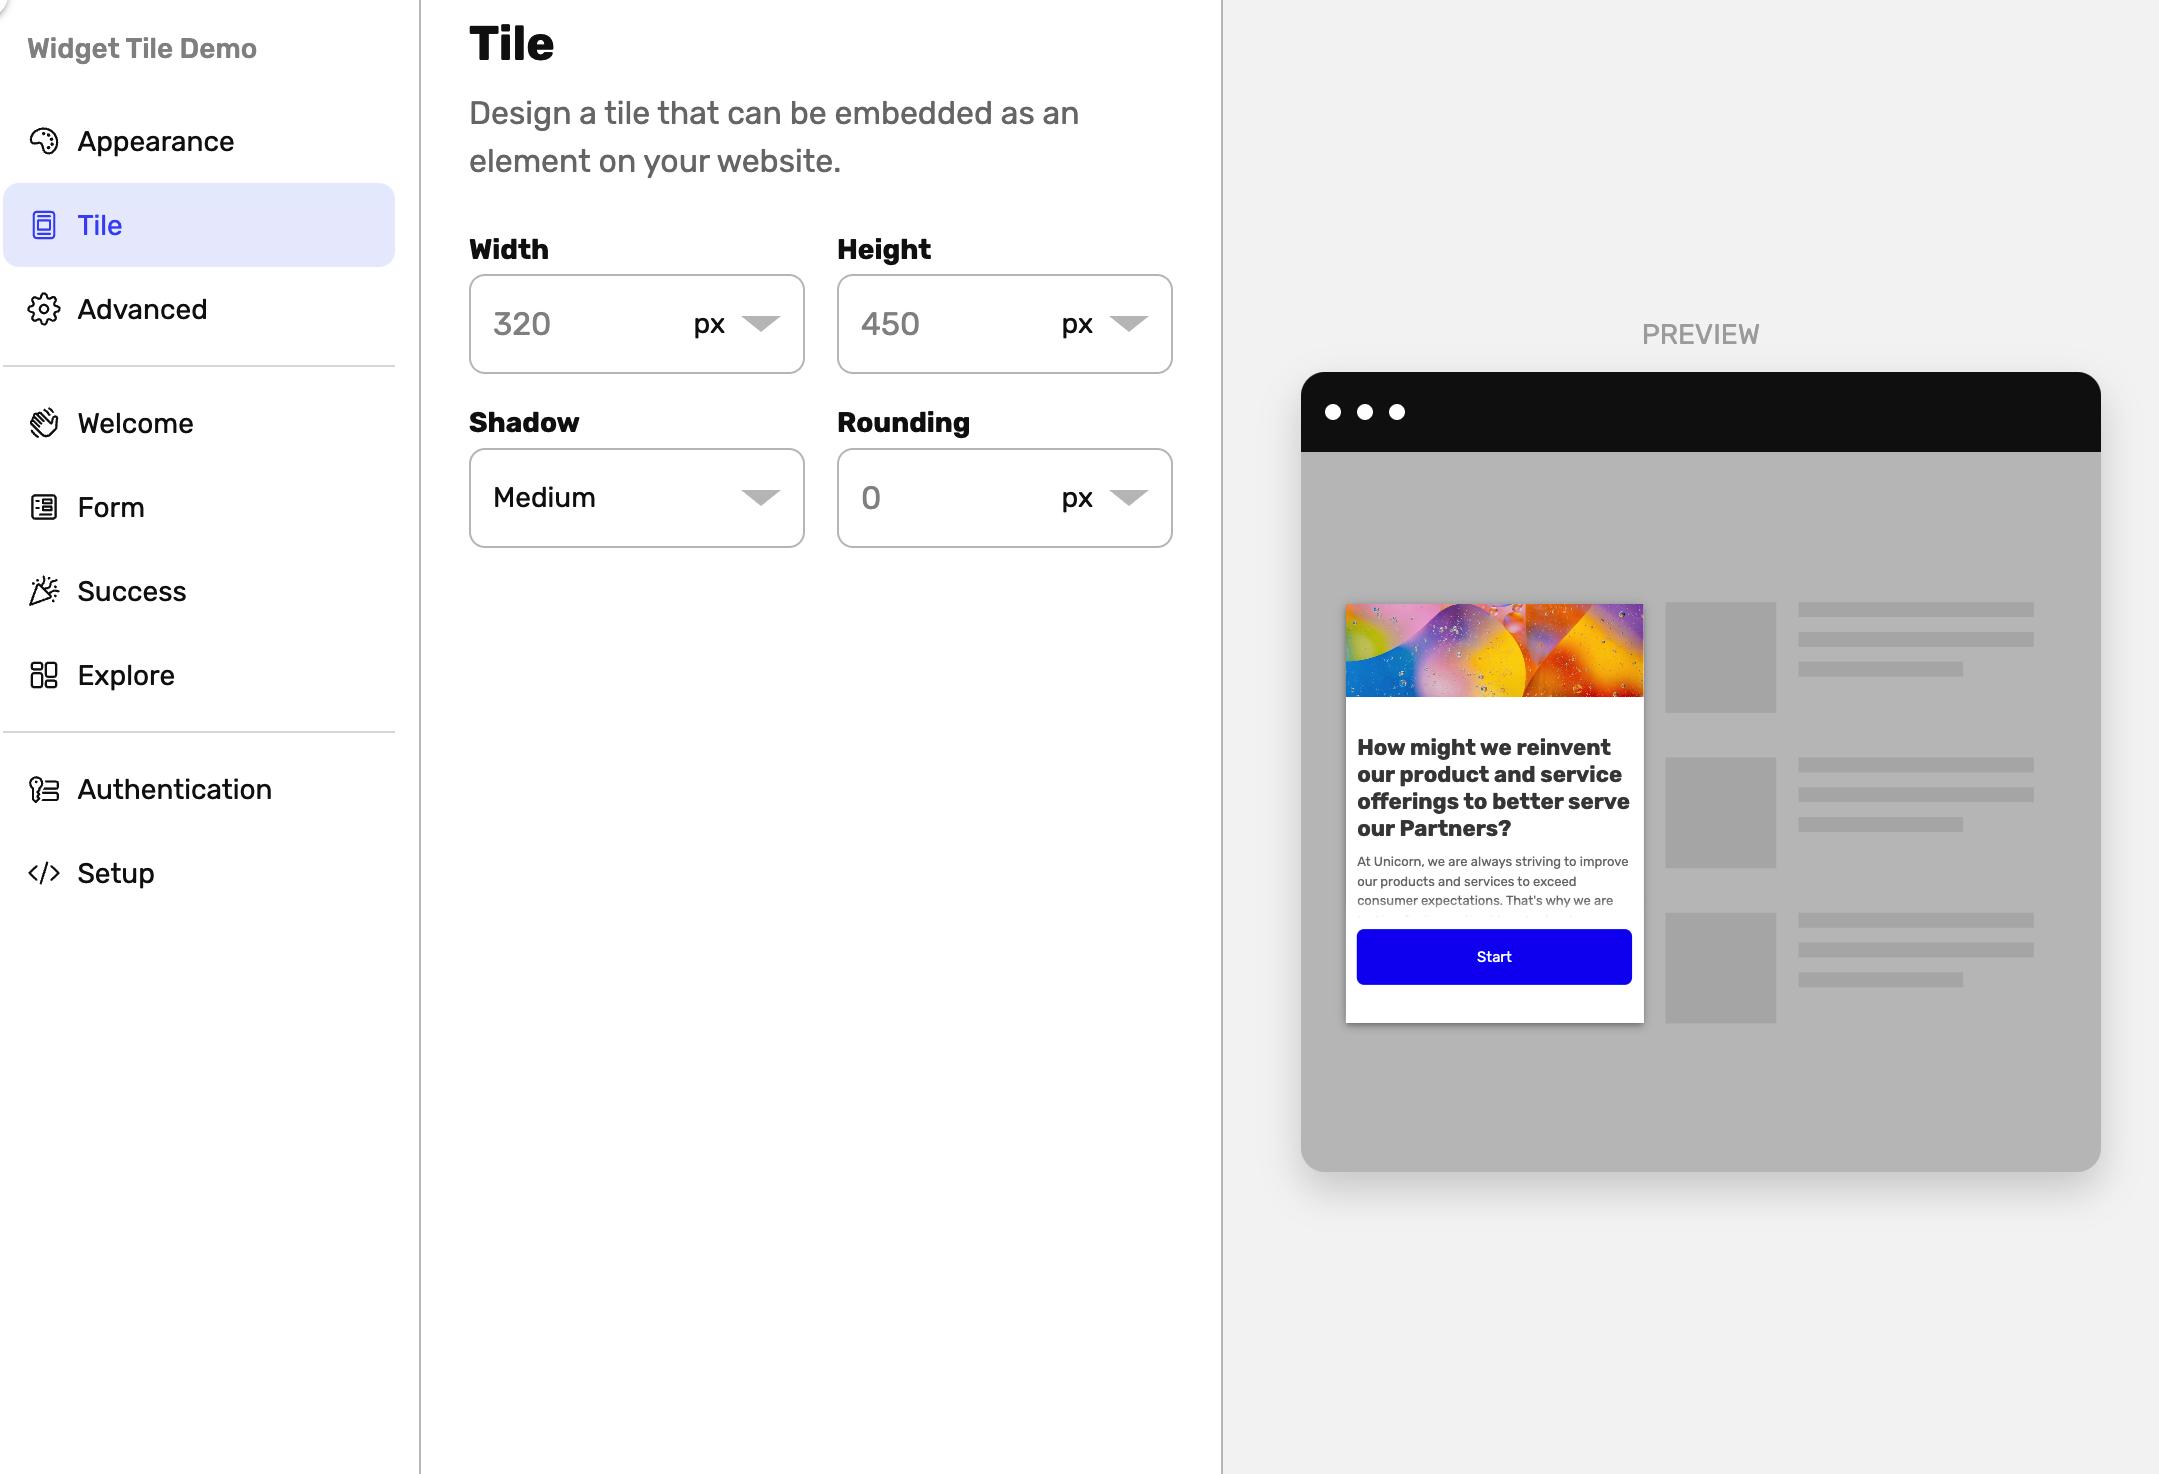
Edit Tile Widget Settings
In the Tile settings You can set the width, height, shadow and rounding attributes. These settings only appear if you have selected the Tile type.
For some use-cases it might make sense to set width to 100% so that the tile scales for mobile devices.
Edit Advanced Widget Settings
The Advanced Widget Settings let you fine-tune the behavior of your embedded Pop Over and Tile Widgets.
You can set an initial delay for Widgets that will appear without click-based trigger.
You can decide if the Widget should appear as a Launcher (a circle in a corner that can be clicked on) or directly as the Pop Over or not at all.

Edit Widget Sampling Settings
You can decide to randomize how many users should see the Pop Over with sampling settings. You can show the Widget to a percentage of visitors instead of all.
Sampling Probability lets you choose the daily percentage of visitors who will see the Widget. Sampled (chosen) visitors will see the Widget appear for the next 24 hours or until they submit an idea, others get a chance to be sampled the next day.
Sampling Interval is like a timeout for sampling. Set an interval to sample visitors again after some time has passed or leave it blank to prevent repeated sampling.
Edit Widget Pages
Edit Widget Welcome Page
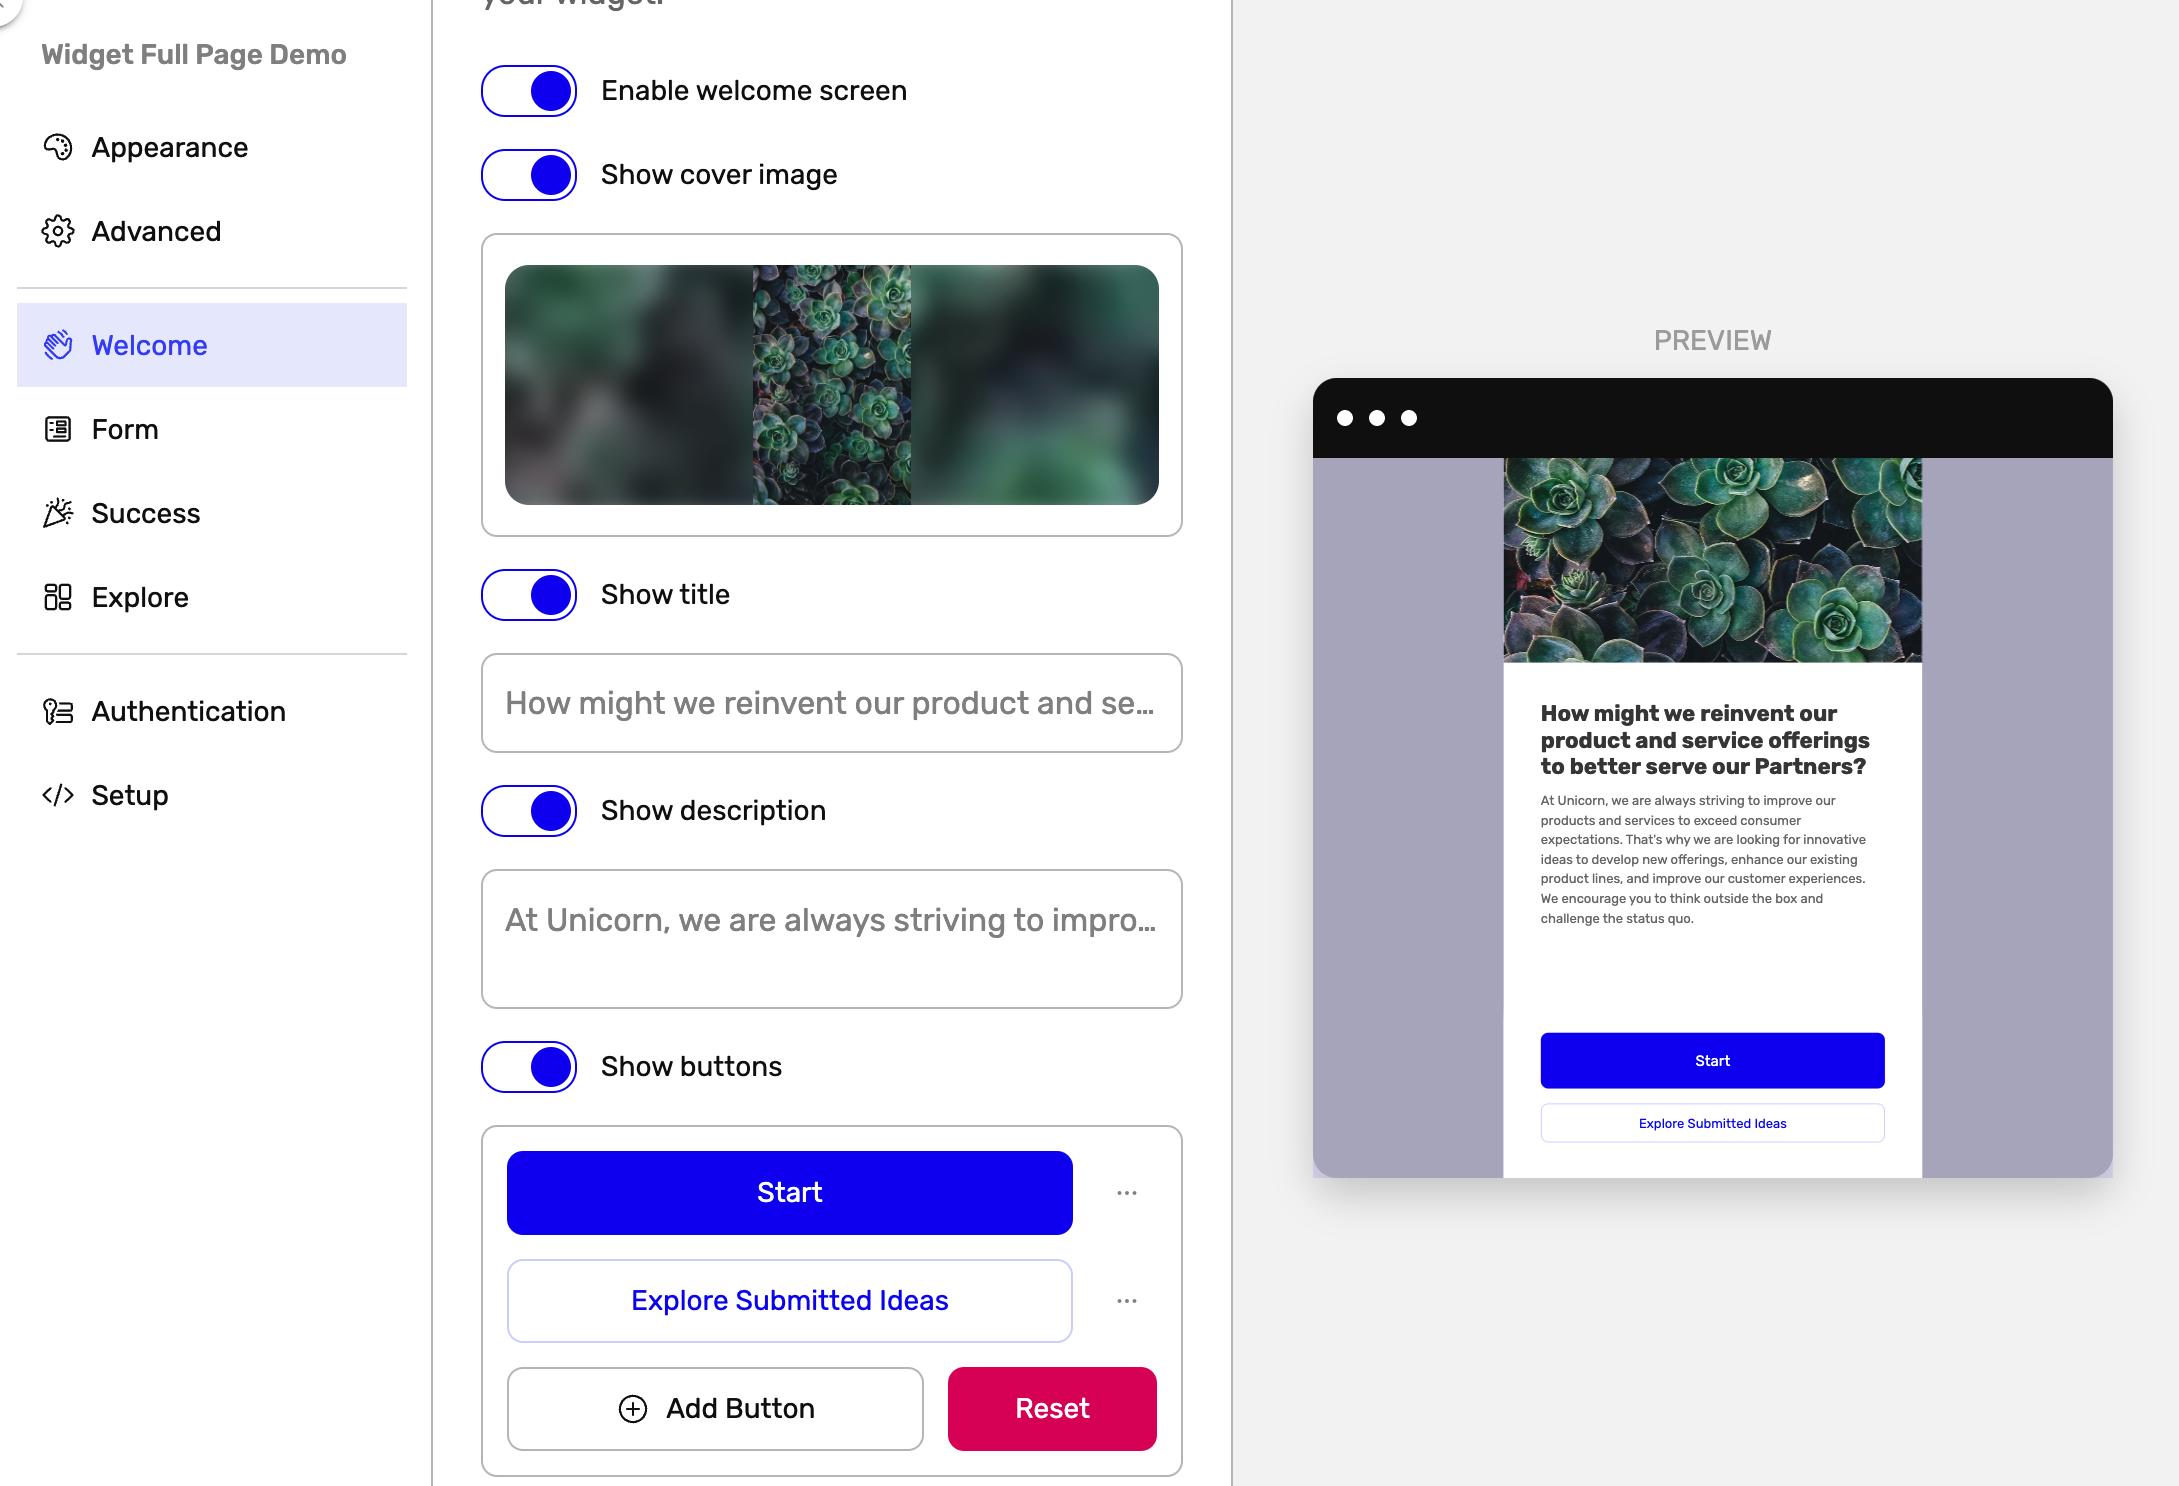
The Welcome page is the first page that is displayed in the Widget.
By default it shows the Idea Collection cover image, question and description but you can choose to override these defaults.
You can choose to toggle off individual parts of the page or disable it entirely, in which case users will see the Form Page.
You can also define Custom Buttons.
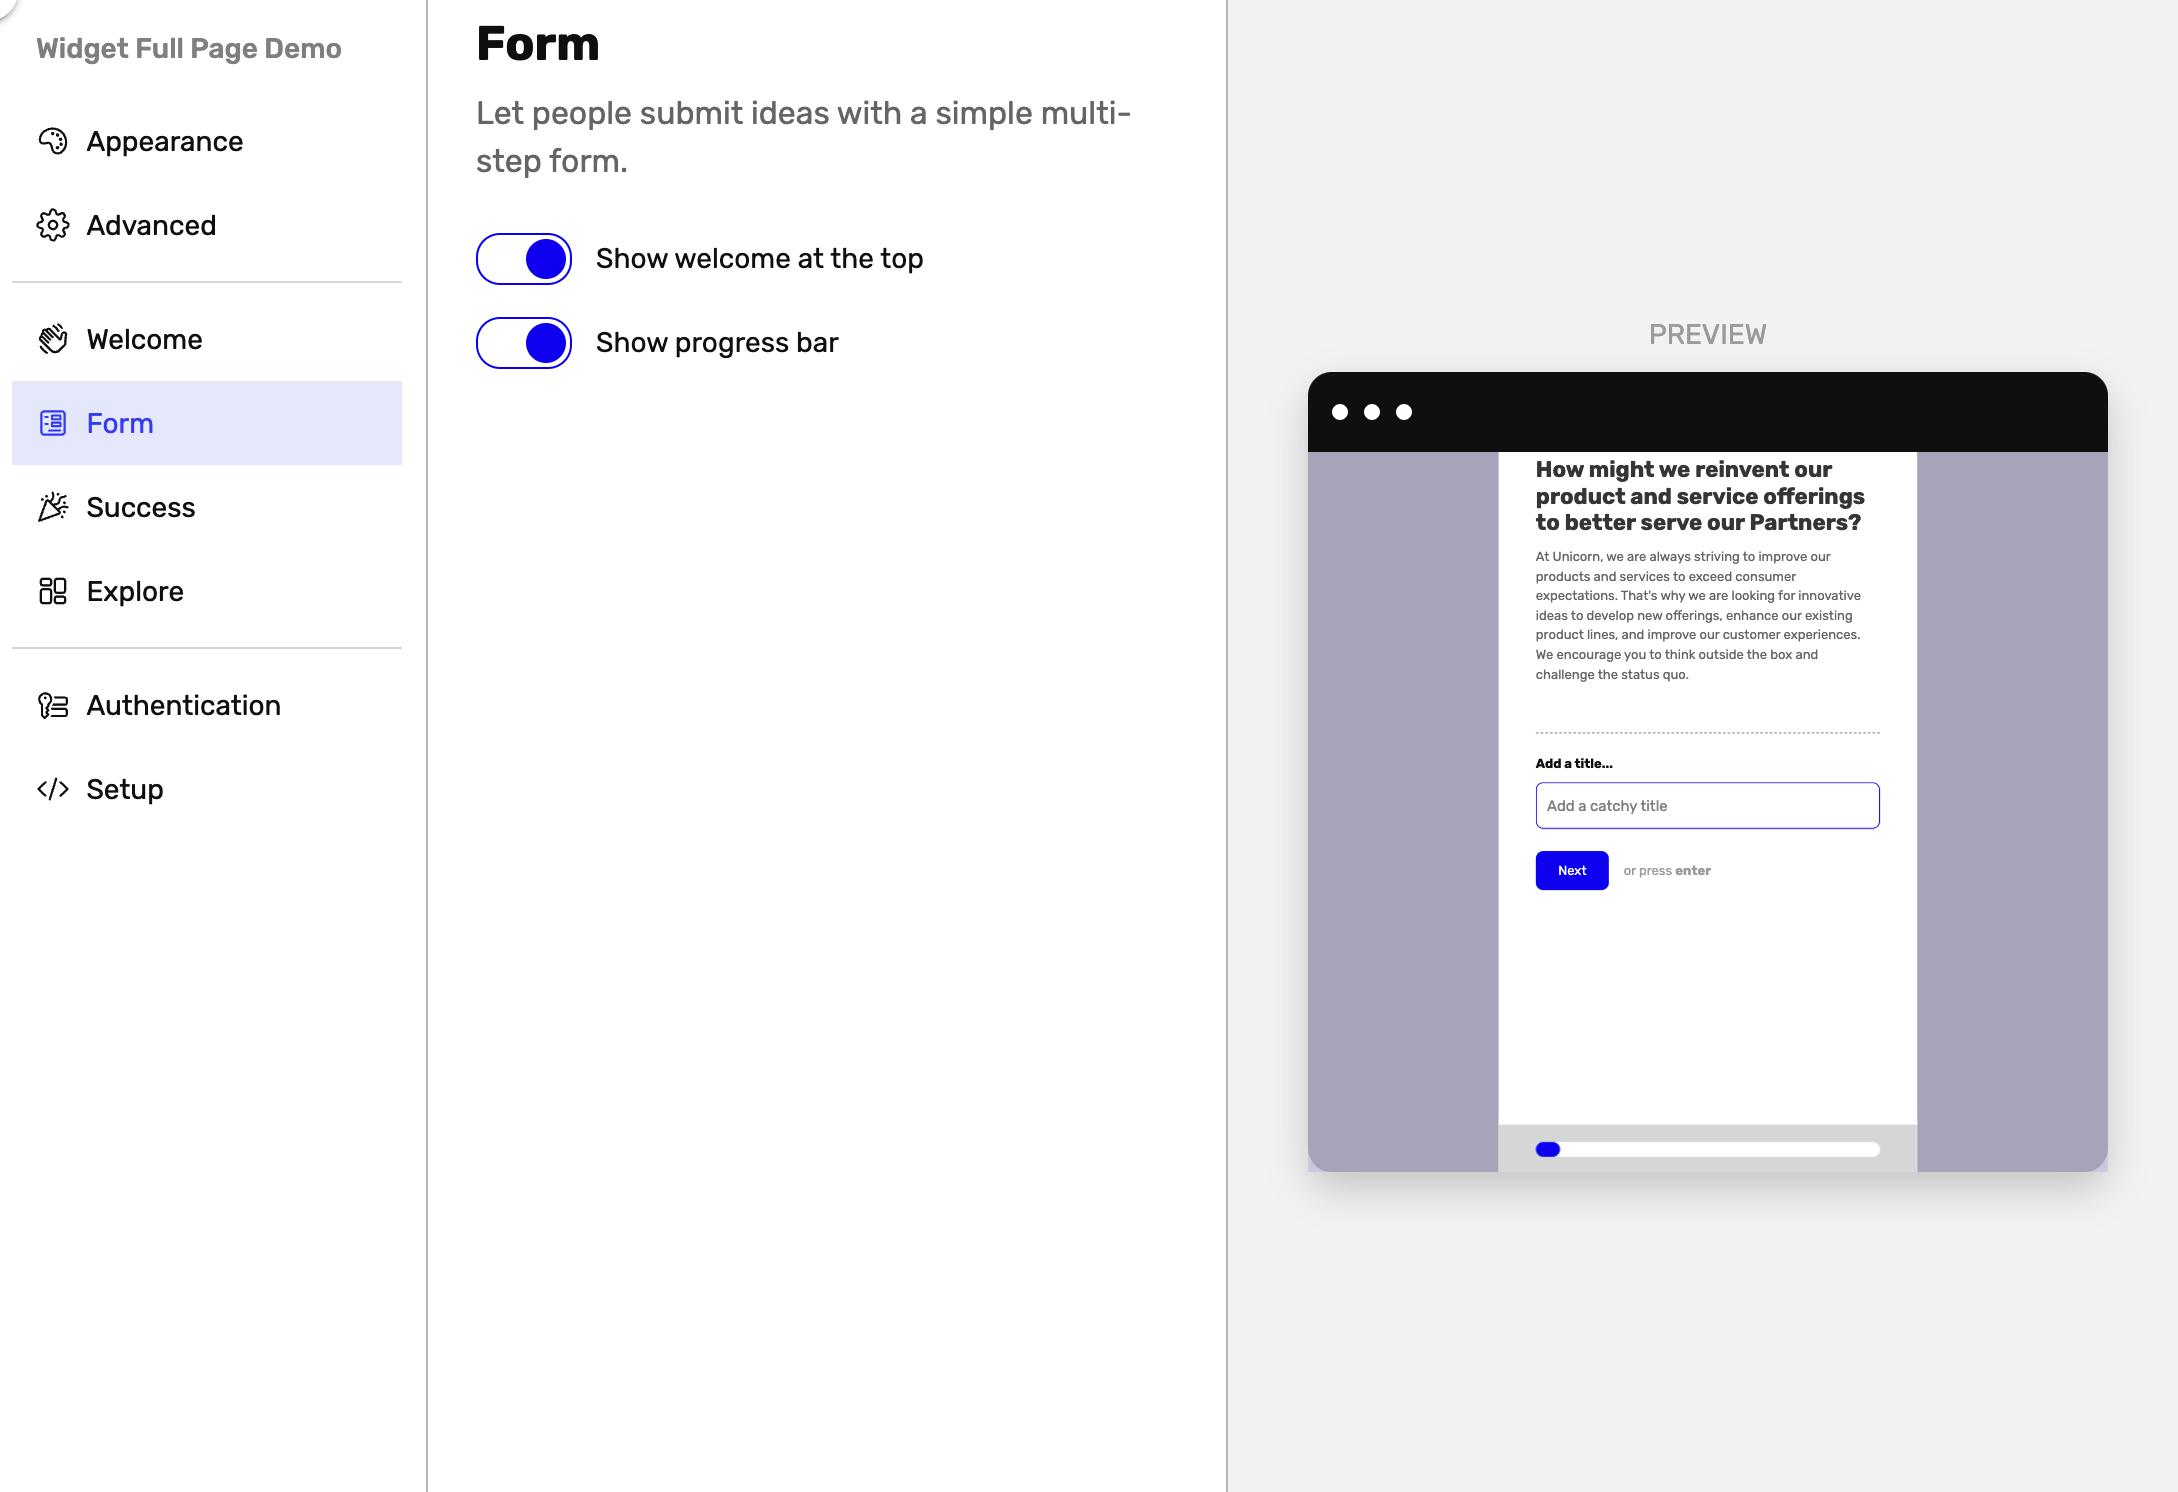
Edit Widget Form Page
The Form page displays the Form of the Idea Collection as a multi-step experience optimized for conversion. Each Idea Field is one step and all Idea Field options like labels, descriptions, placeholder text and conditional visibility are respected.
By default the Welcome Page is shown in a small preview at the top of the Form Page so the user can check the context of the Idea Collection if they want to.
A progress bar is also shown at the bottom to indicate how many steps are left and gamify the idea submission.
Both the Welcome Page and the Progress Bar can be toggled off.
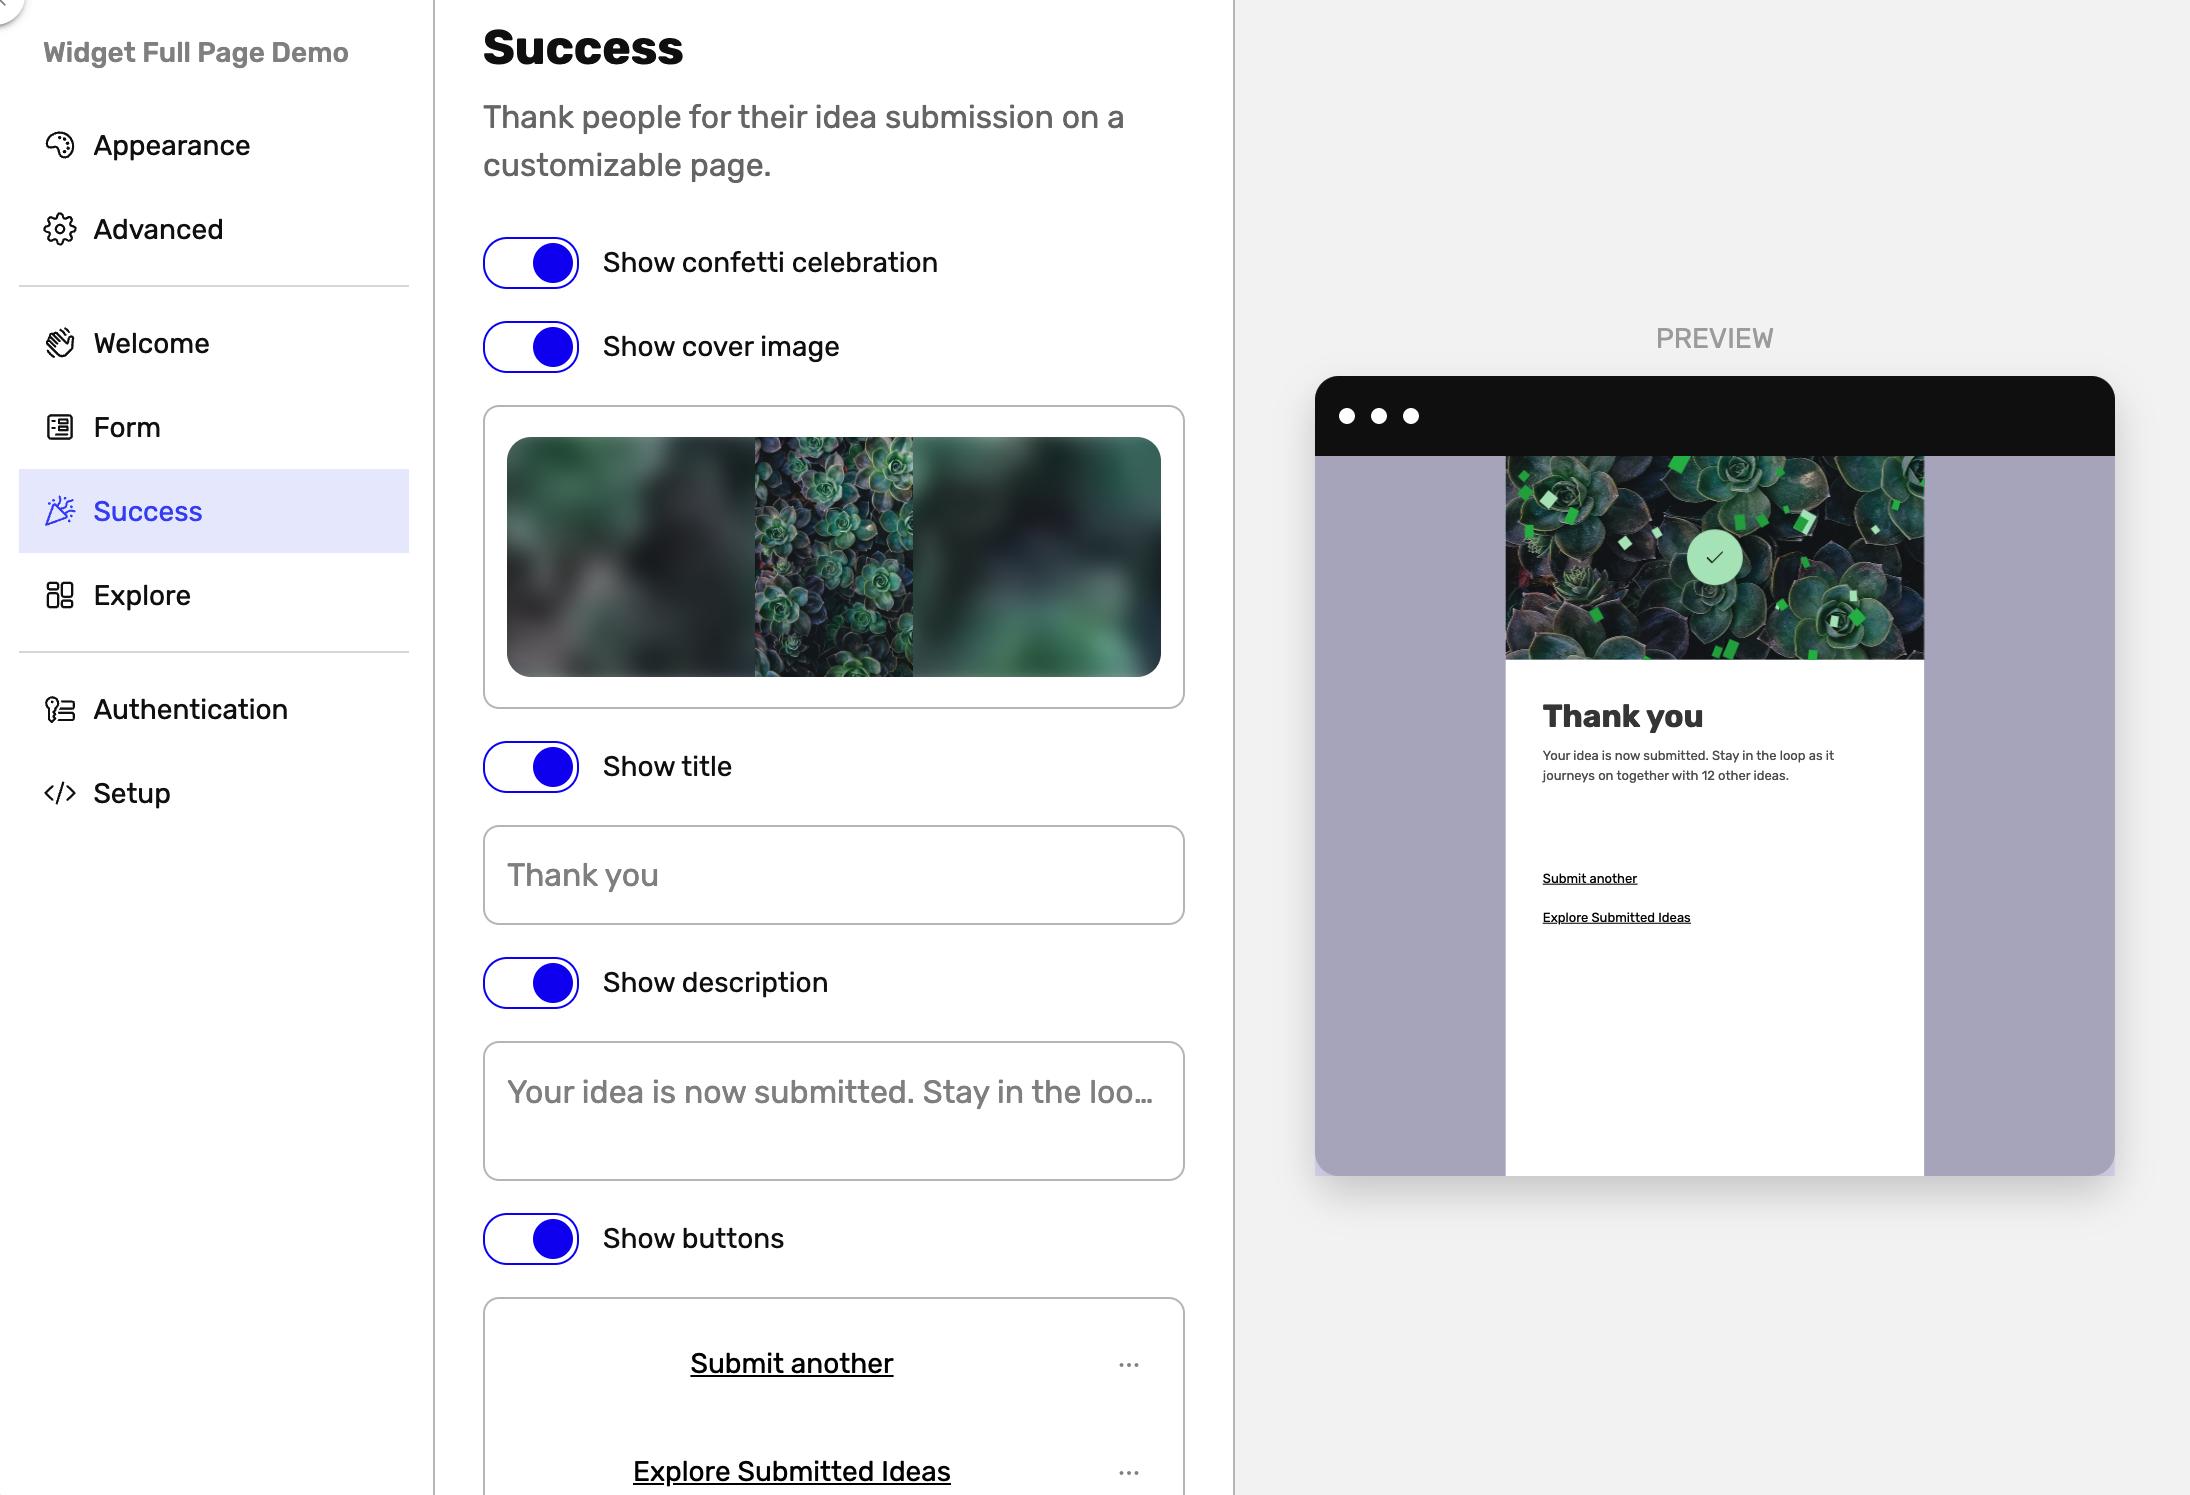
Edit Widget Success Page
The Success Page is shown after successful idea submission. It's a great place to celebrate and explain to the user what will happen to submitted ideas. You can also choose to add Custom Buttons, for example to let the user explore other ideas or submit more ideas.
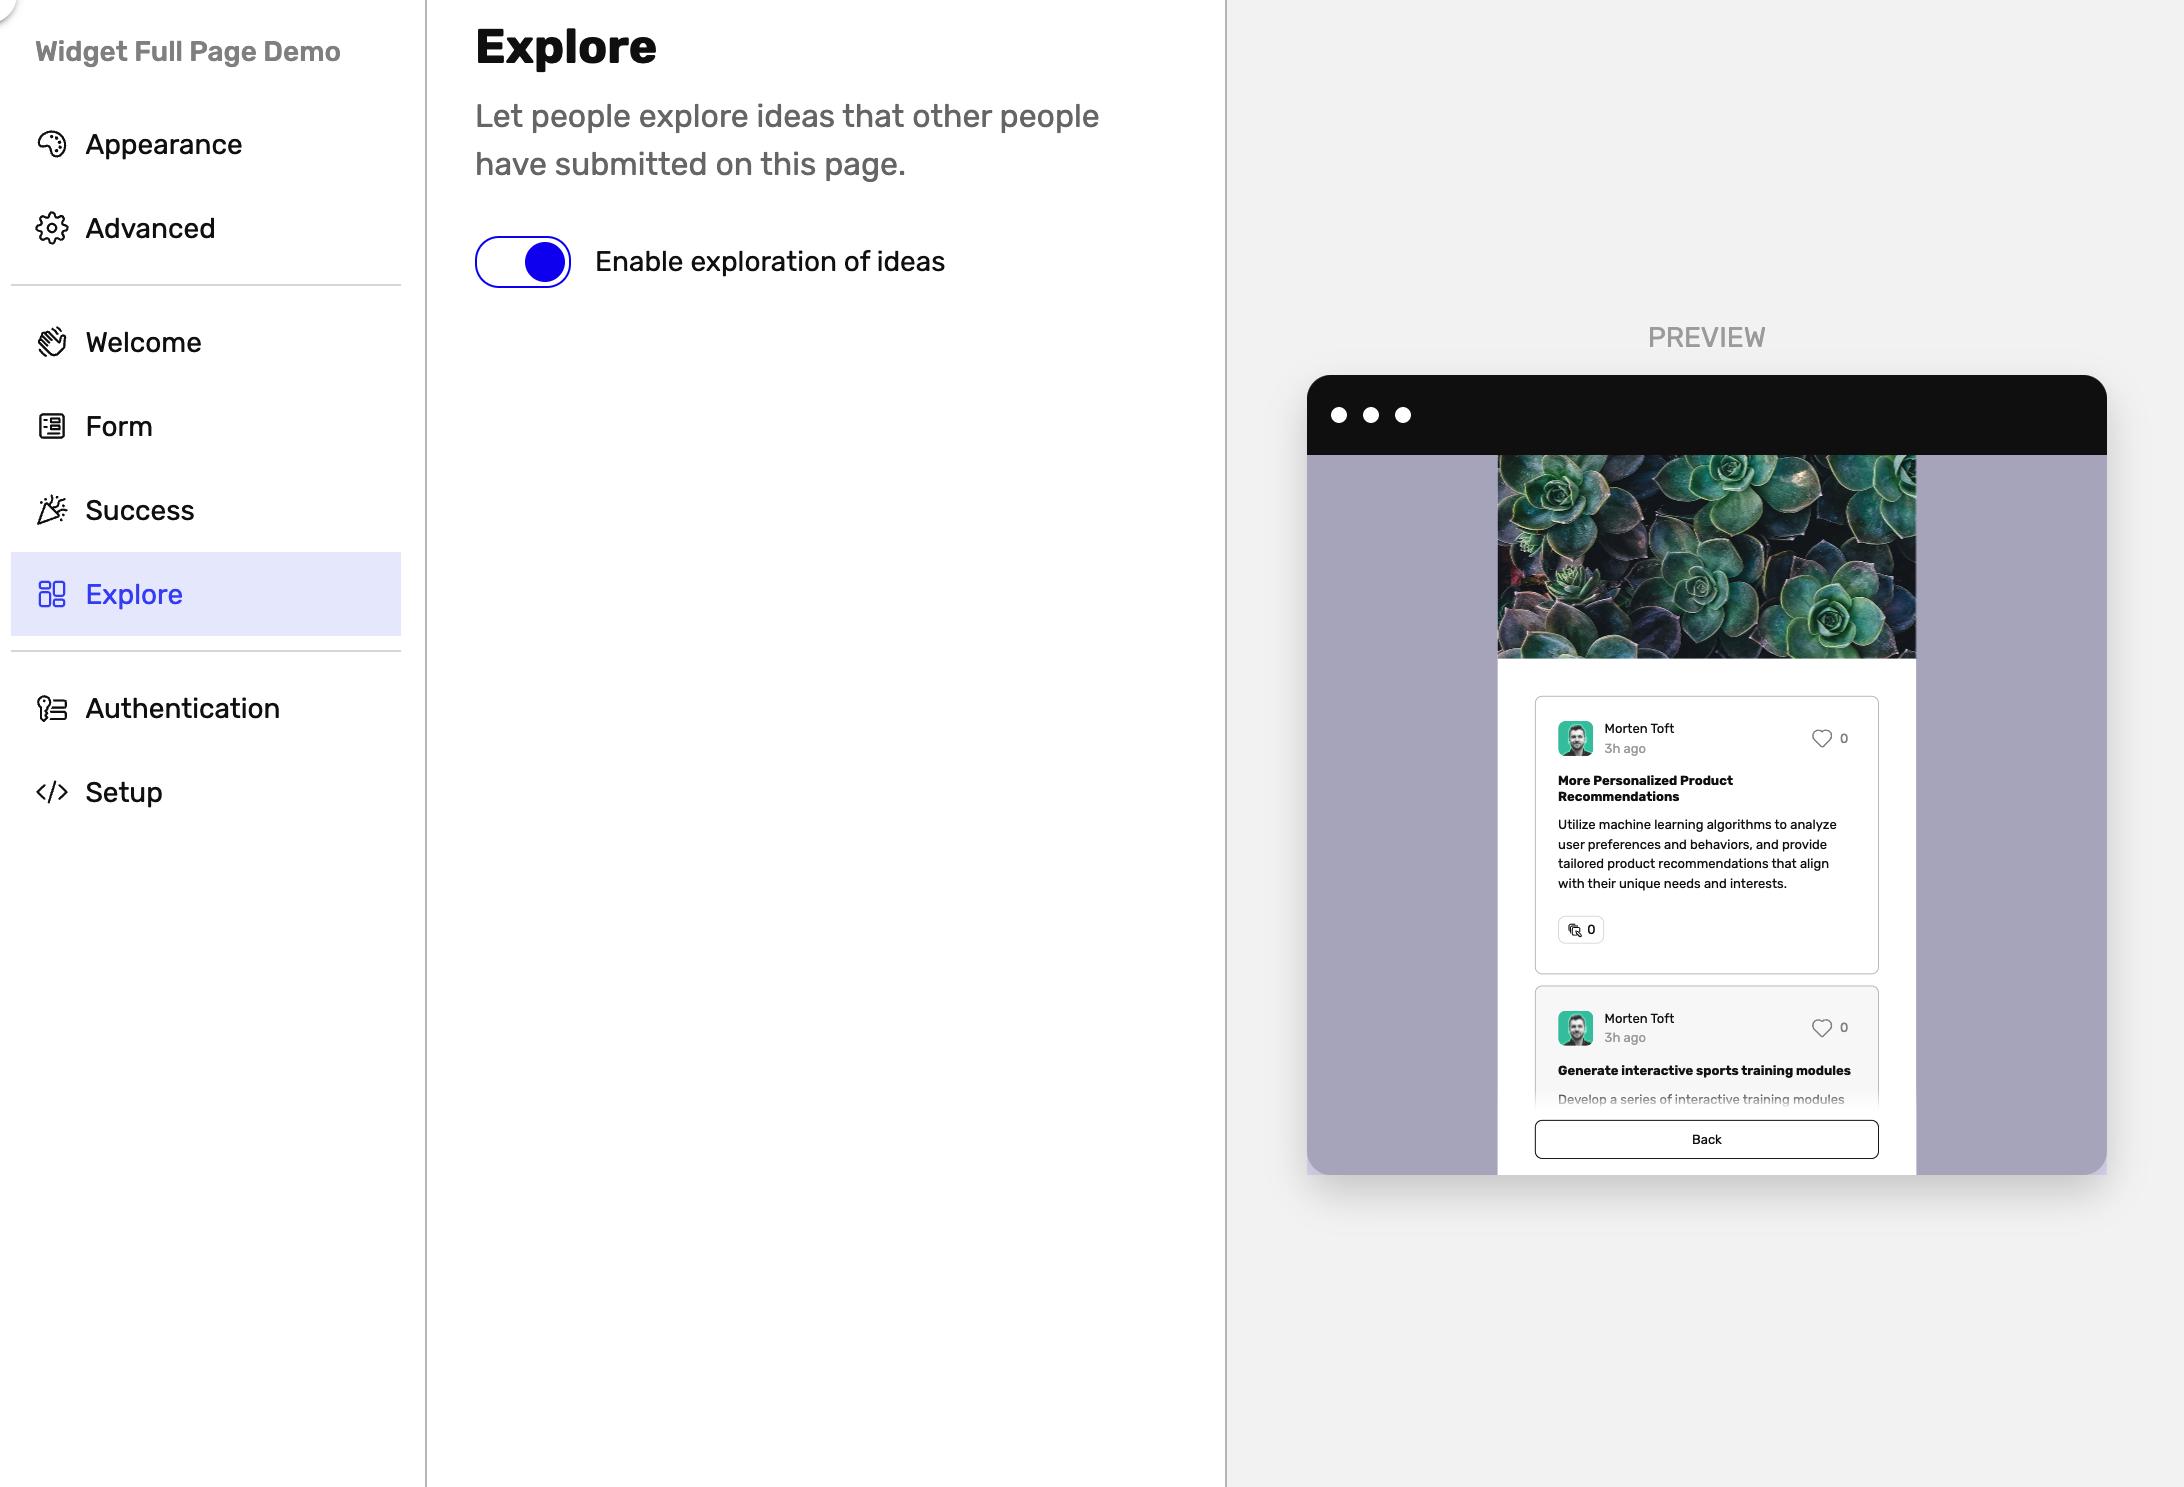
Widget Explore Page
The explore page displays a list of submitted ideas in a simplified list. You can choose to enable or disable this Page and you can choose to link to it from other pages.
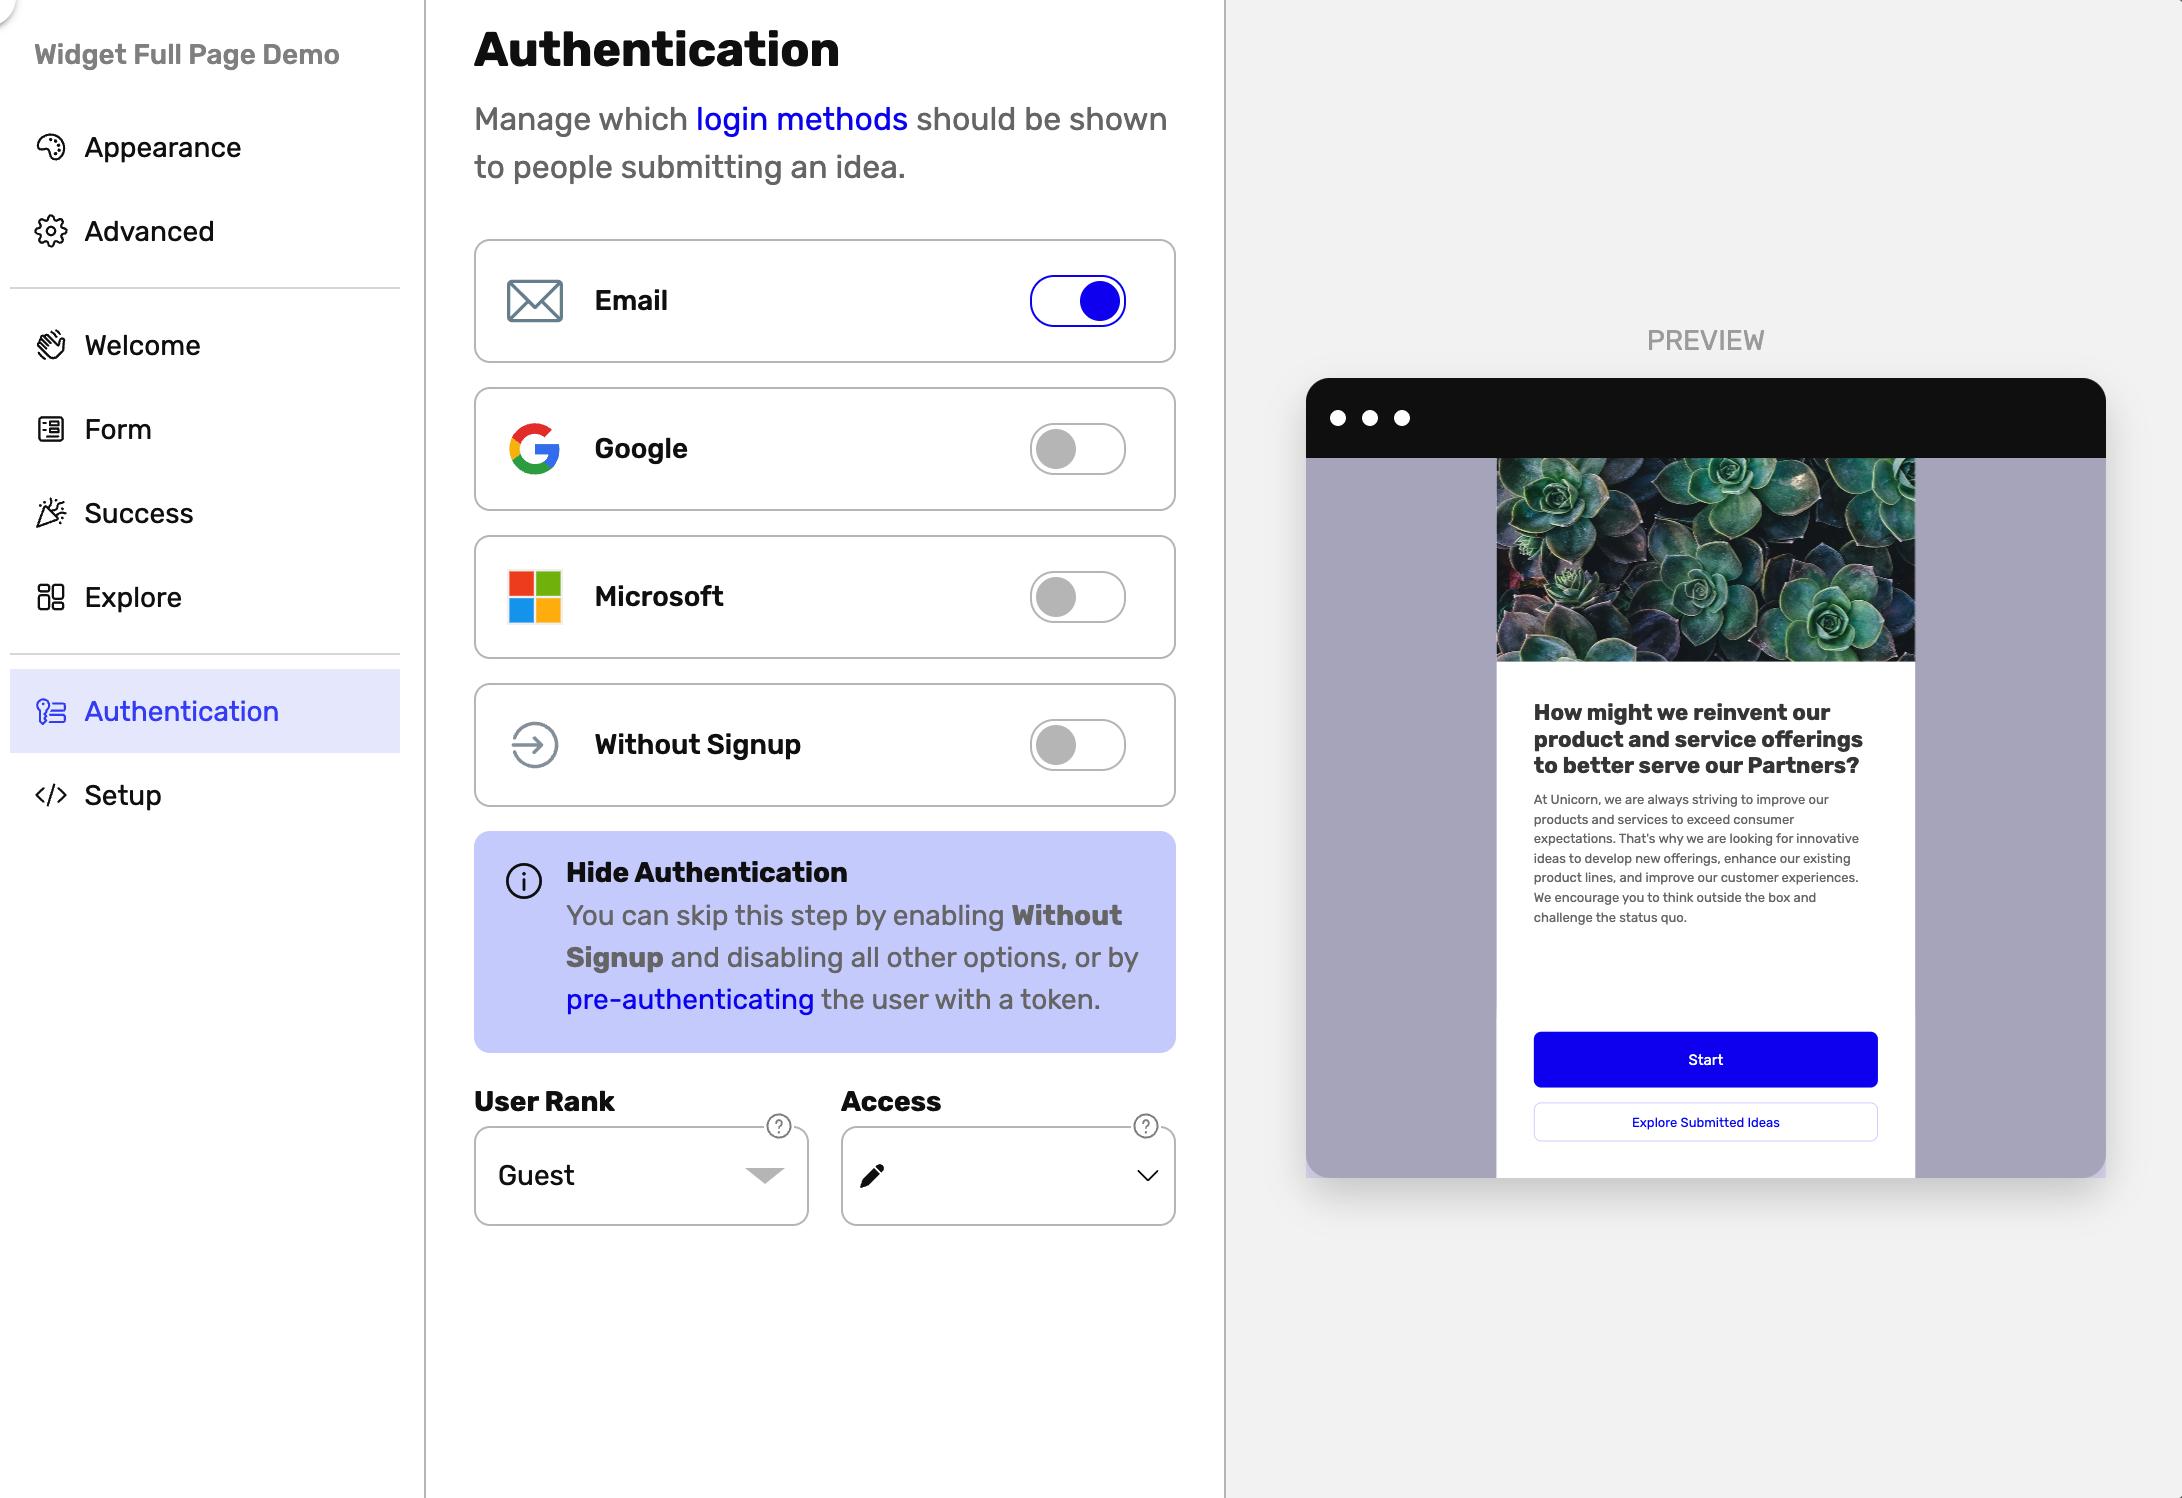
Edit Widget Authentication Settings
In the Widget Authentication Settings you can manage which login methods should be available for users when submitting an idea and which rank and access new users should get.
For example you could let people sign in with SSO and give them idea creation and commenting rights and on the Success Screen use a custom button to link to a View of the Idea Collection where they can comment on existing ideas.
You could also opt for social logins like Google or an experience "Without Signup" that lets users submit ideas without having to create a user. While good for initial engagement a downside to this would be that you can not reach out to them later in the process.
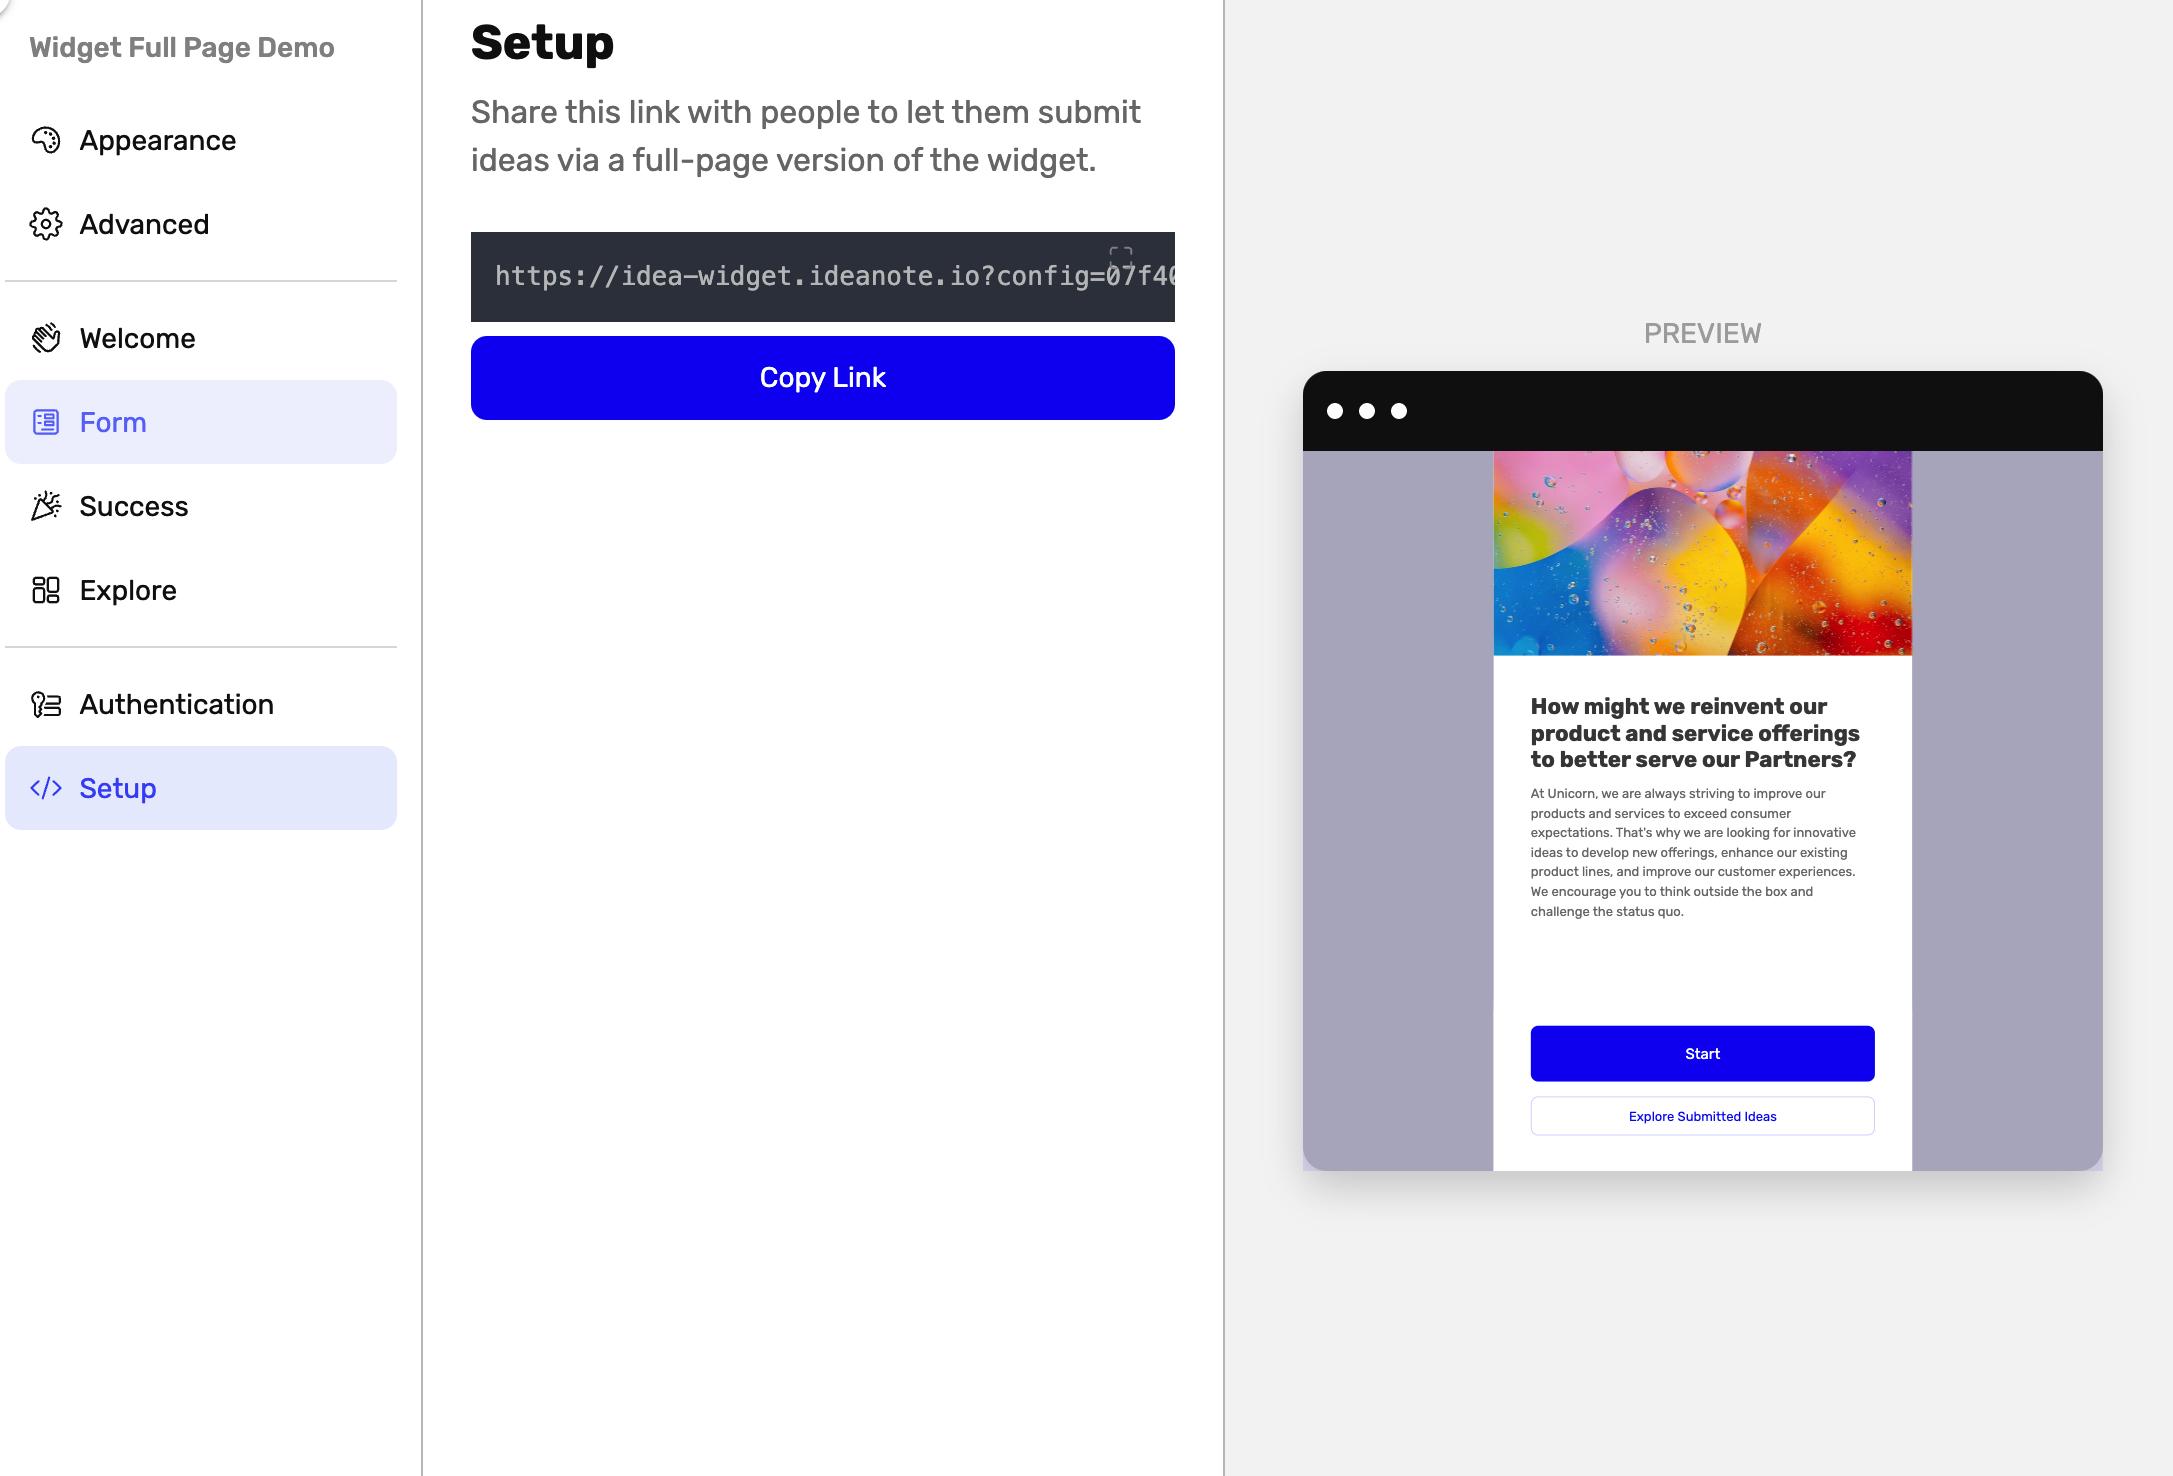
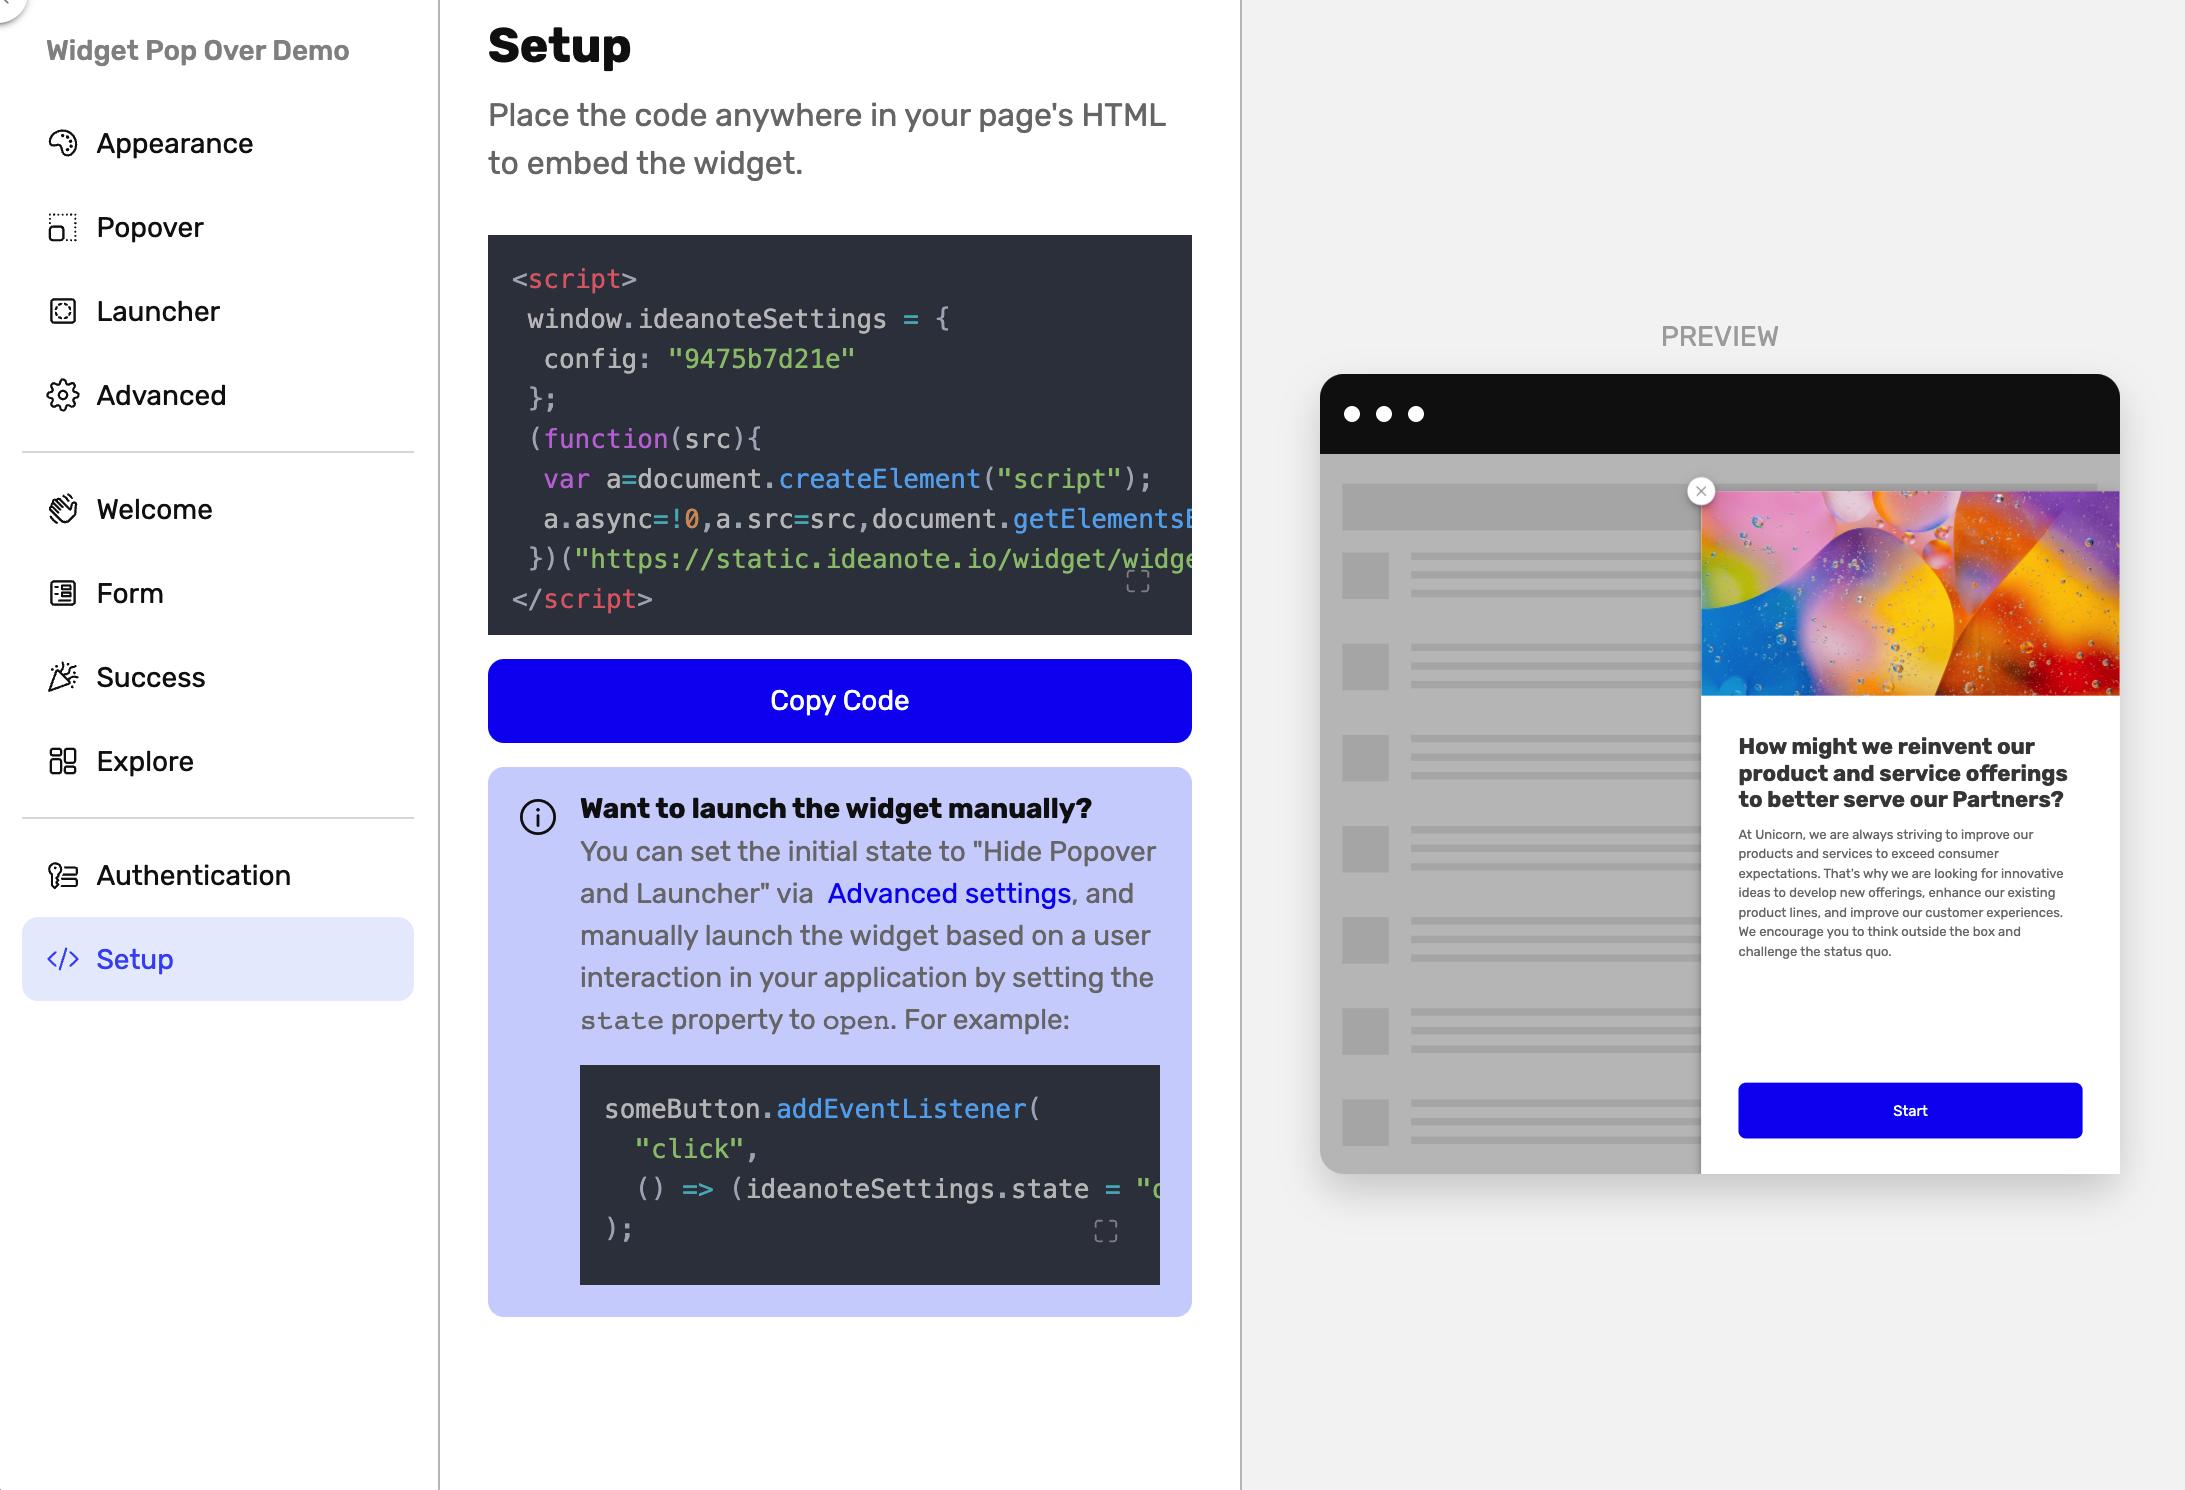
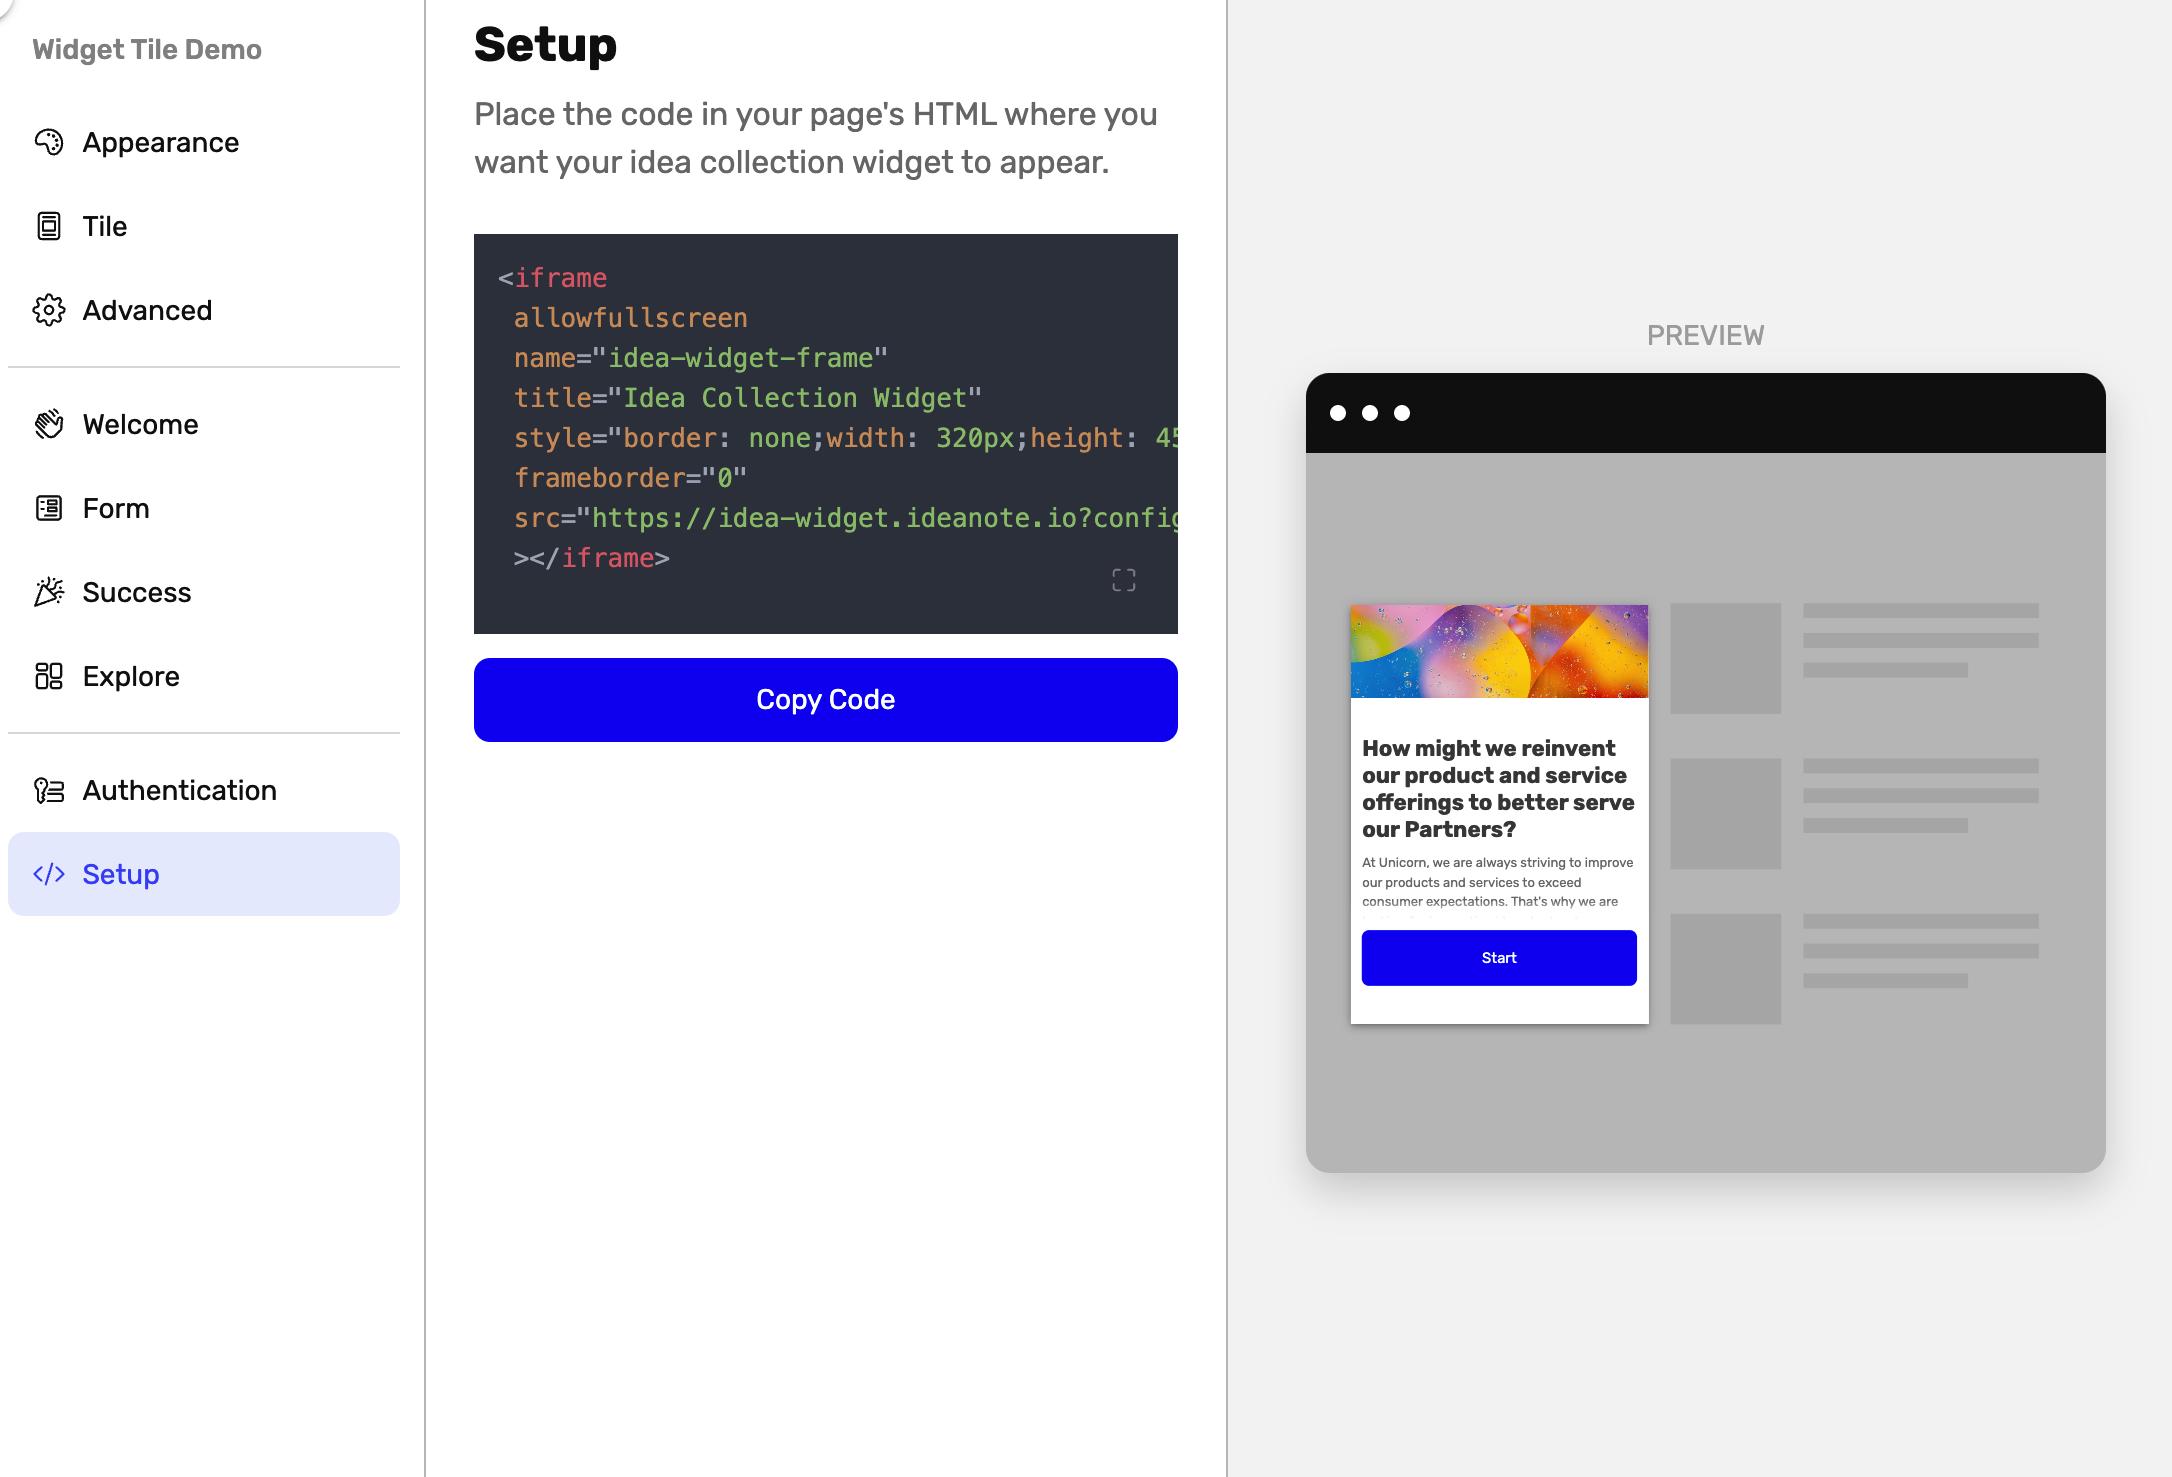
Get Widget Set Up
In the Set Up of the Widget you will get guidance on how to share or embed the Widget you have created.
You can always go back and edit the Widget settings later and it will be reflected without you having to replace any embed codes.
.svg)
